Assembly Process
Assembly Instructions
Before beginning construction, you (and your assembly partner) should carefully read through the instructions and view any pictures available. We provide a copy of the manuals with the confirmation package to allow plenty of time to get this done. We also encourage you to contact us with any questions or concerns prior to starting the project. Especially note the terminology that we use for the different parts and various functions. We urge that you not try to build the dome in an order different from the steps laid out in the instructions – some shortcuts that look attractive have traps in them. Many of the installation steps take longer to read than to do. While no complex carpentry or other skills are needed, you will be required to perform measurements, check that pieces are level and straight, locate and drill holes, and install bolts. Sometimes edges of fiberglass need to be trimmed or sanded. However, no experience is needed in working with fiberglass and no application of fiberglass or resin needs to be done. None of these pieces weighs more than 45 pounds, so even though they are bulky, they are relatively easy to handle. (HINT) – Try to pick a day with no wind. The fiberglass sections, especially dome quadrants, make great sails!
We would strongly urge that you have a second person helping you. This allows you to check each other and will help avoid mistakes. The second person can help a great deal in holding items in place while the first drills holes and installs bolts. (HINT) – Three or four vise-grip-type clamps can make the job much easier!
The leading cause of future problems with the dome operation is not taking the time to assure that the dome is round and falls within the circumference tolerances. There are tables in the manual for both the Base Ring and Dome Support Ring that must be consulted in this process. When determining roundness, multiple measurements must be taken at a variety of locations around the base ring. (HINT) – Try taking a straight pole or 2×2, measure and mark the outside diameter (119 inches for the 10-foot domes), and use it to take verify roundness as you move around the dome. (HINT) – Laser measurement tools work great and can be purchased at Home Depot/Lowe’s for $20-$30.
Finally, if you make a mistake, don’t panic! In most cases, you can just take the components apart, drill new holes and do it over. If you want to, you can always go back later and patch any mistakes with resin (this is one of the virtues of fiberglass). (HINT) – Automotive fiberglass repair “Bondo” works great and can easily be sanded!

Dome Assembly
The observatory domes from Technical Innovations are shipped in sections and require assembly at the final installation location. The general approach to dome assembly is the same regardless of size. The two primary considerations throughout the process are keeping roundness (within listed circumference tolerances) and maintaining levelness. This requires stopping for measurements multiple times throughout assembly, even when the preassembly service was provided. Manuals provided by Technical Innovations take you through the assembly process step-by-step and are supplemented with drawings and photos. By choosing the dome size category to the left, you will see a series of photos that are a sampling from the new assembly CD now provided with the observatory dome assembly manual.
Dome Preassembly
Technical Innovations offers an optional preassembly service. Preassembly is much more than just a “pre-drilling” process. The dome is completely constructed, with all accessories (except rectangular and circular skirts), and then put through a complete series of “working observatory” tests. When disassembled for crating, as many parts as possible are left in place and seams are carefully marked. Walls can be created in “stacks” rather than individual ring sections. Preassembly typically reduces re-assembly at the owner site by more than 50% Pre-assembly by Technical Innovations does NOT remove the need for the assembly instruction manual. We strongly urge you to read the entire manual so that you will understand the order of assembly and how to work safely. The manual will help you learn the parts and their functions. Many of the assembly steps require attention to spatial relationships among components, so you should not “blindly” bolt pieces together using only diagrams in the manual. The rectangular and circular skirts are NOT preassembled because they must be fitted to your structure.

Notes On Pre-Drilling
| Technical Innovations now offers an optional pre-drilling service. Referencing the “Bolt Hole Drilling Guide” you will see that a great number (both “Guide” and “Final”) of the bolt holes required to assembly the dome can be measured and drilled on a “workbench” prior to actually assembling the observatory. Using pre-measured and accurate templates, a Tech at the TI warehouse shop will drill as many of the holes as possible prior to crating for shipment. In many cases (wheels, side rollers, j-guides, latch bars, handles, shutter catchers, wind restraint, and others)the holes drilled are “final” and the customer needs only to mount the parts per the manual. In some cases, holes must be drilled through two fiberglass sections (normally corresponding flanges) in order to bolt those two sections together. A good example of this would be the equatorial flange of each dome quadrant and the corresponding mounting location on the Dome Support Ring (DSR). Before the two can be bolted together, the DSR must be adjusted to the proper circumference and the quadrants positioned with both the proper spacing as well as cosmetic (flushness)appearance. Since the measurement and location of holes are “fixed” on the quadrant equatorial flange (and “variable” based upon adjustment of the DSR), the quadrant holes can be measured and pre-drilled at the plant. During dome assembly, once the DSR is properly adjusted on the base ring and the quadrants positioned, these pre-drilled holes on the quadrant equatorial flange are used as “guide” holes to complete the drilling of the DSR and bolting the sections together. Although this “final” drilling is required there is no measuring or chance of errors. A complete list of holes drilled during pre-drilling is available upon request. Pre-drilling typically reduces assembly at the owner site by 25% to as much as 40%. Pre-Drilling by Technical Innovations does NOT remove the need for the assembly instruction manual. We strongly urge you to read the entire manual so that you will understand the order of assembly and how to work safely. The manual will help you learn the parts and their functions. Many of the assembly steps require attention to spatial relationships among components, so you should not “blindly” bolt pieces together using only diagrams in the manual. The rectangular and circular skirts are NOT pre-drilled because they must be fitted to your structure |
Mounting Domes
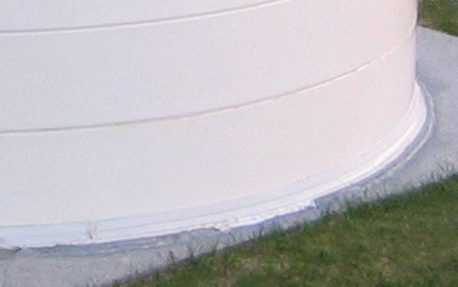
The observatory must be securely fastened to protect it from high winds and bad weather. Most standalone observatories are mounted onto concrete pads, but some people elect to bolt their observatory to a wooden deck (with an independent pier and pier support structure). We suggest using concrete anchor bolts approximately every 15″-18″ around the circumference. The bottom ring of the observatory has a 3″ or 4″ mounting flange which turns to the inside all around the circumference. Typically a 2″ long 3/8 anchor bolt will be adequate. A large fender washer should be used inside between the bolt head and the fiberglass flange.
Weather Sealing
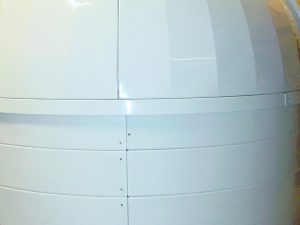
Your observatory will arrive with several tubes (depending upon size, number of wall rings, etc) of quality clear silicone weather sealing. Once construction of the observatory is completed, this silicone should be applied to the seams where fiberglass sections are bolted together. The three primary areas (as displayed in the photo) are where the dome quadrants meet, where the dome halves are mounted onto the Dome Support Ring, and where the wall ring sections are attached to each other as well as the rings above and below. A small bead of silicone should be applied with a regular caulk gun and can be smoothed to an even and consistent finish.
Moving Domes
The reason our observatories are classified as “temporary structures” for zoning/permitting purposes is that they truly can be un-assembled and taken to a new location. Often the most difficult task when taking the dome apart is the removal of the clear silicone provided for weather sealing. We advise customers who know that they will only have the dome at the first location for a short period of time, to use a strippable caulk during the initial construction and save the silicone for after moving the dome to its permanent location.
Hours
Monday through Friday:
7:00 am to 4:00 pm.